To steek and finish the armholes and neckline of this vest, you will need:
- A small scissors (small is better here – big scissors are clumsy)
- A crochet hook (3.5 mm/E-4 or similar)
- Tapestry needle for weaving in ends
- Yarn for steek reinforcement and ribbing
- Your below-gauge-size knitting needles (3.75 mm/US 5) for knitting ribbing
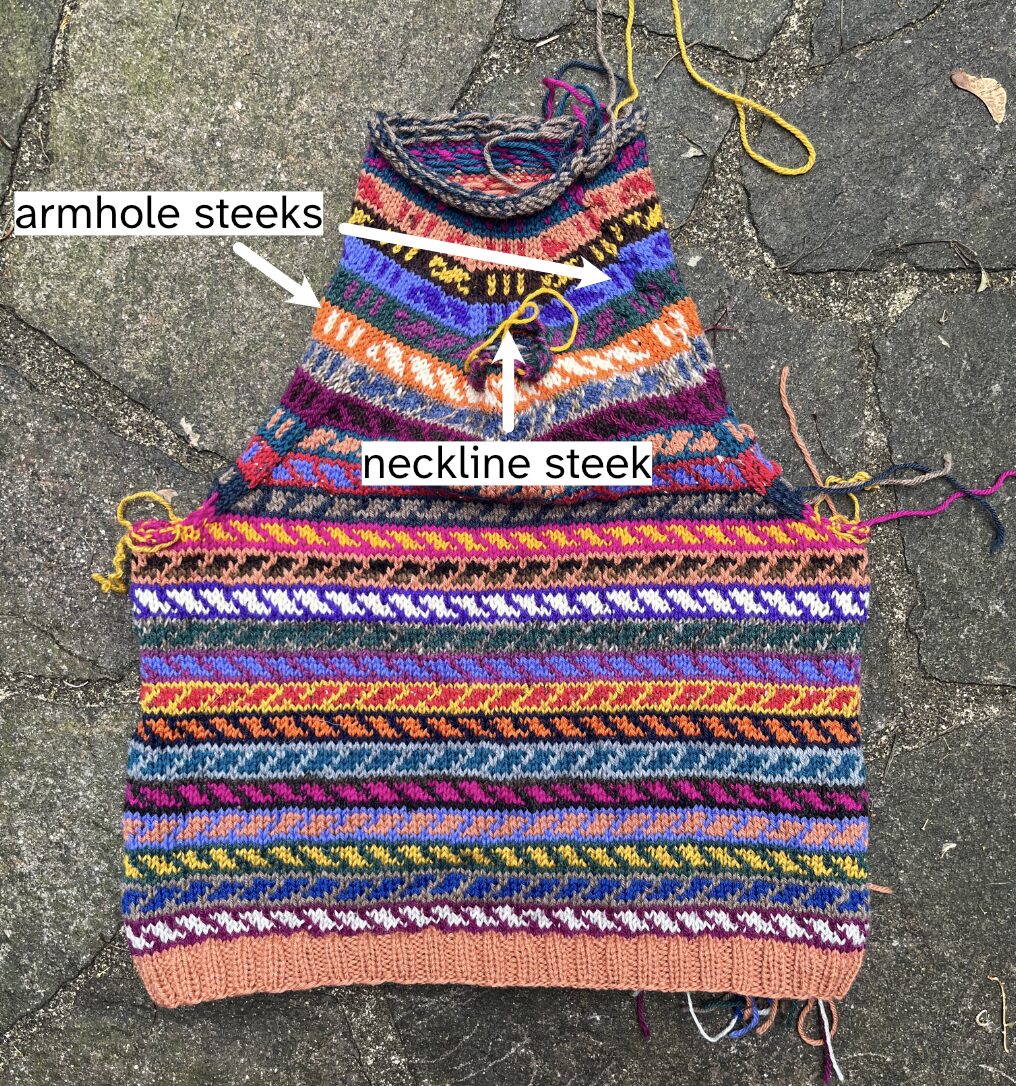
Once you have completed knitting, your vest will look like this.
(Try it on like this. You’ll be amused at how it fits.)
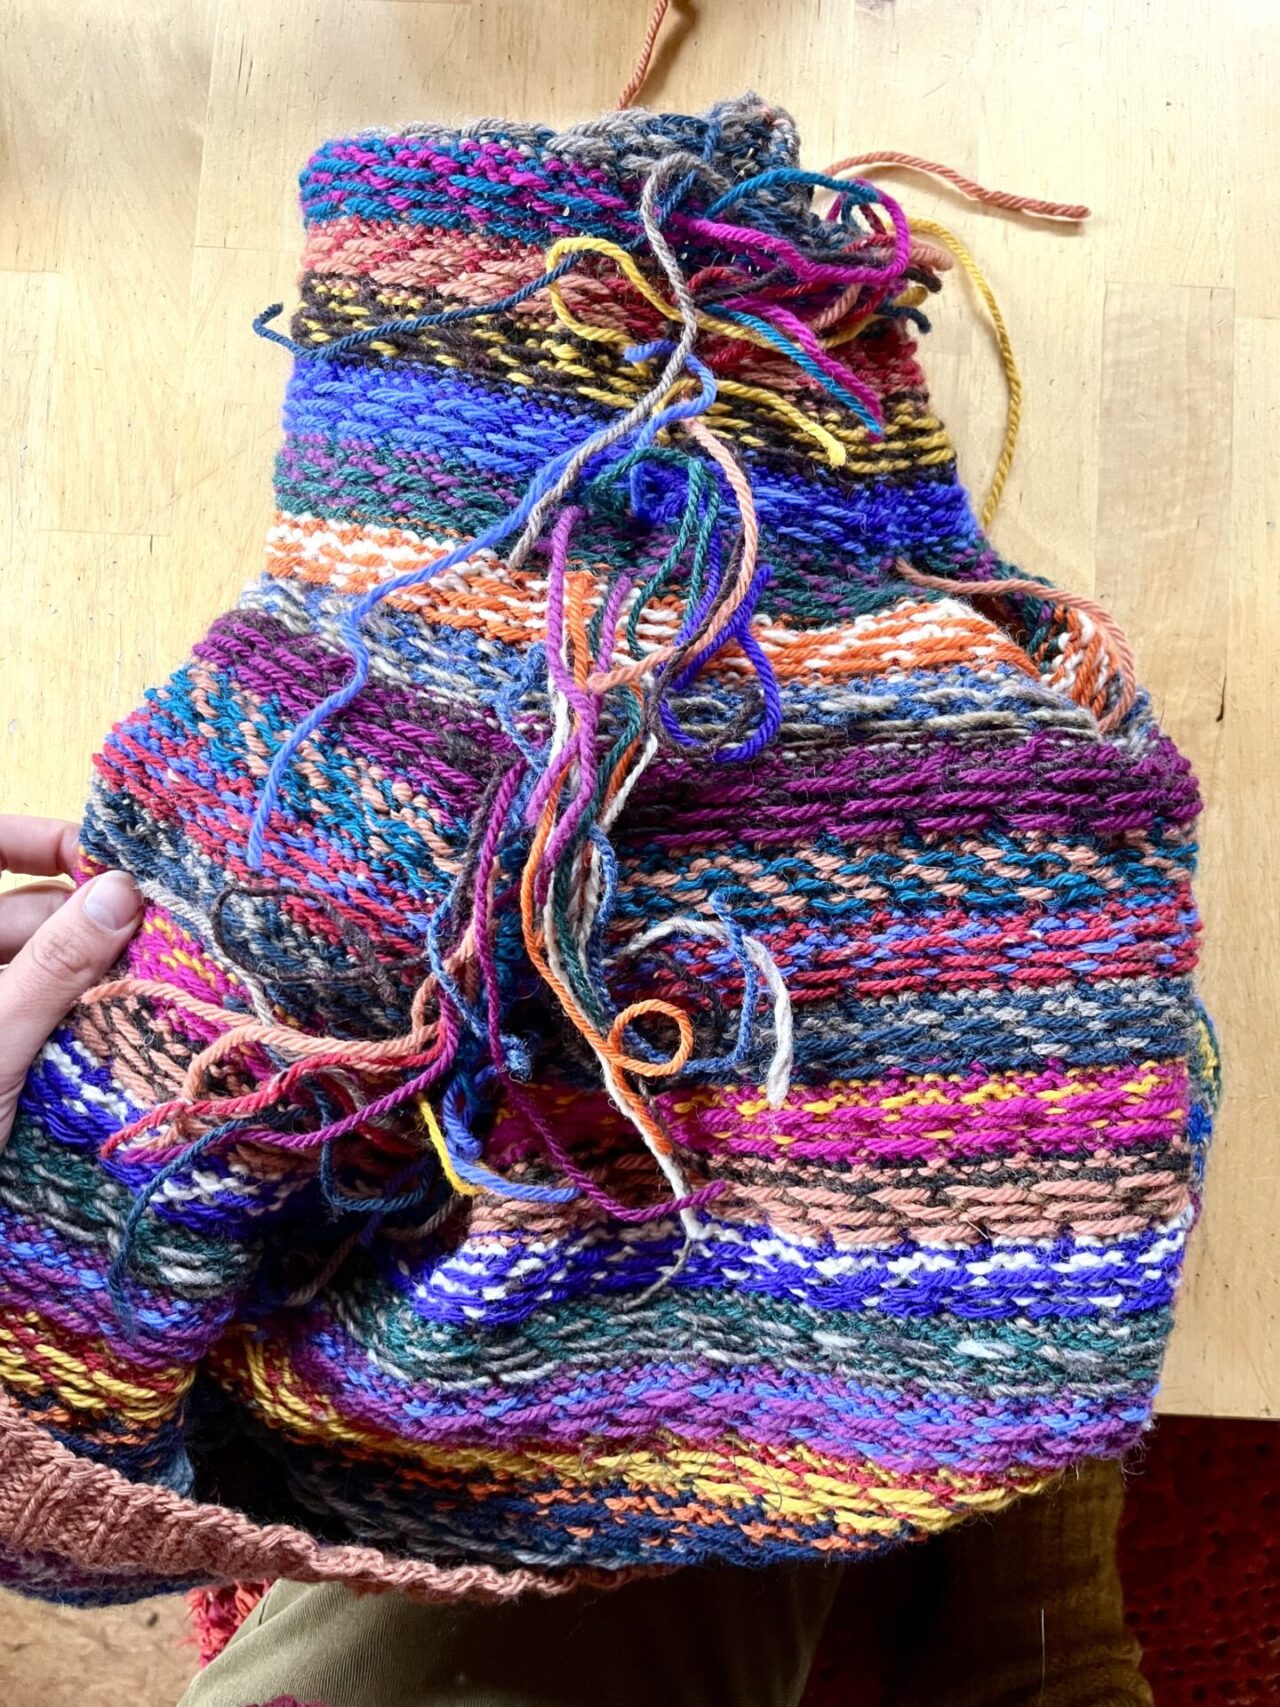
Wait! What do I do with all my yarn ends?
If you’ve knit the vest as a stashbuster, you likely have a million ends to weave in.
You have two options here:
- Take the time to weave in all the ends before you start the steeking process. This is the most secure option.
- Give all of them a firm tug to make sure none of the stitches are loose, and proceed without weaving them in. If you’ve been consistent about where you’re changing yarns, the crochet chain reinforcement should catch all the ends. Give this a double-check before you cut anything to be absolutely certain that you have caught everything. If there are any tails that have escaped, you can pass them through the crochet chain with a tapestry needle. Once you have cut your steek, you can just chop off all the yarn tails.
I used the second method and it worked pretty well. There were a couple of ends that escaped, but I was able to stitch them down in the final stages of finishing the steek.
I wove in all the ends under the underarm as I usually would, with a duplicate stitch.
I’m nervous it won’t fit!
I totally understand. It’s hard to tell at this stage what’s going on on with this vest, and obviously you can’t try it on.
If you want to do a quick double check, you can use a contrasting thread to baste along the outline of half of the front, so you can see the outline of the vest clearly. Fold the vest down the center front and position it on your body so that the shoulder seam sits where it normally would, the center front fold is aligned down the middle of your body, and the side seam ends up on the side. This will give you a decent idea of where things will land. Remember that we will be adding ribbing to this, so if the neck seems too deep or wide, that’s normal.
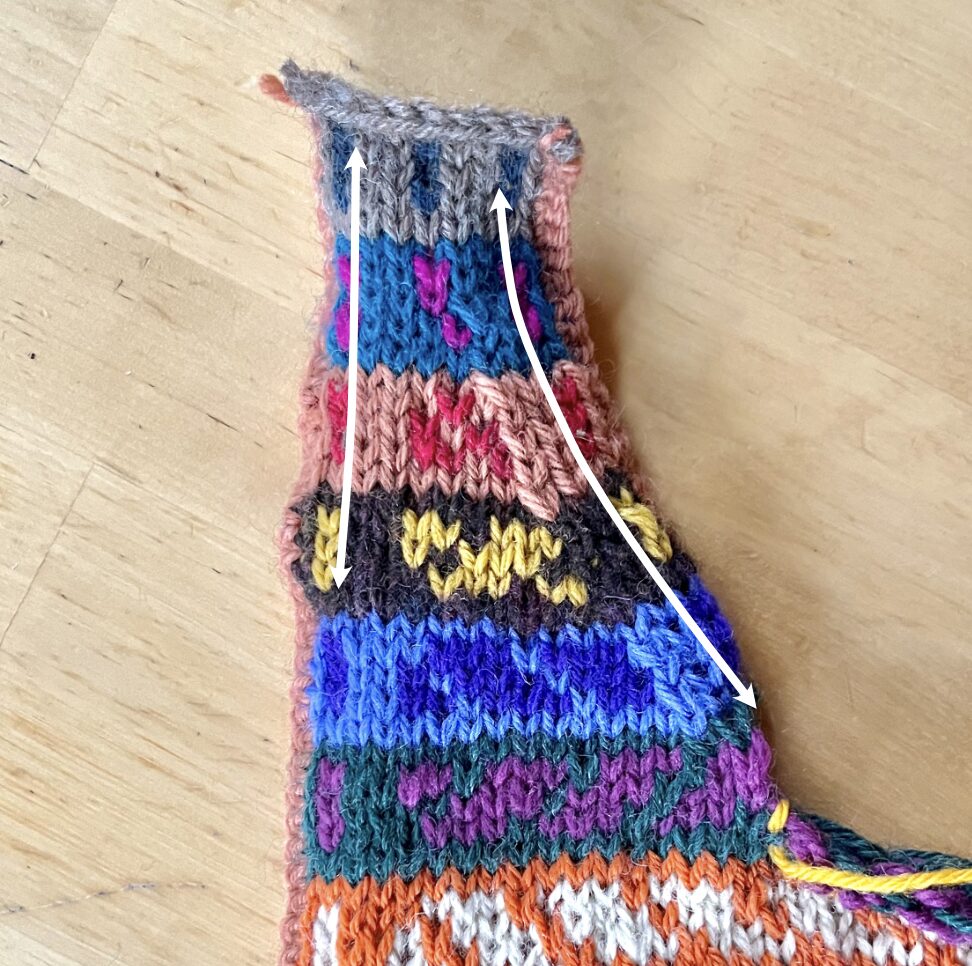
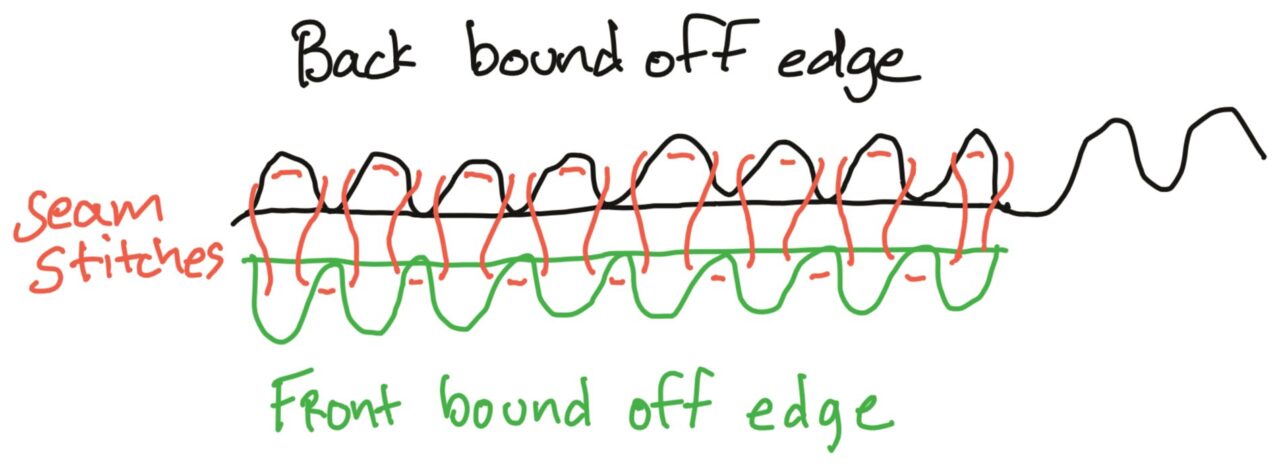
Reinforcing the steek
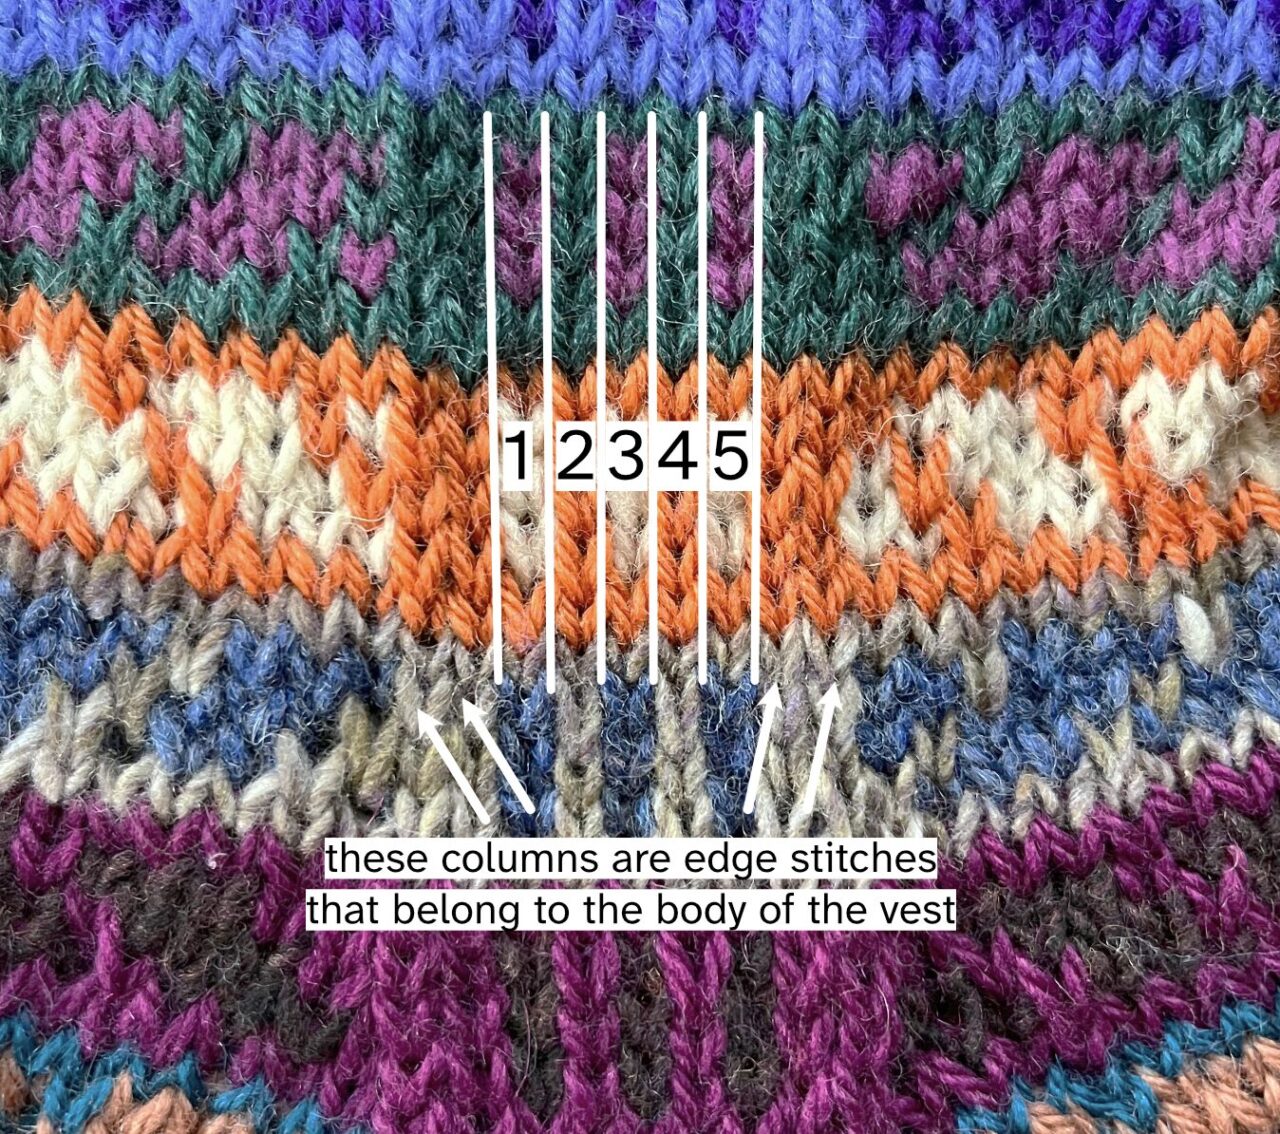
We will first reinforce the steeks using the crochet chain method. Our steek has 5 stitches. The right reinforcement catches half of stitch 3 and half of stitch 4. The left reinforcement catches half of stitch 2 and the other half of stitch 3. The cut is made down the middle of stitch 3, in between the two reinforcements.
Using your extra yarn, make a slip knot and place it on the crochet hook.
Insert your crochet hook into the bottom of stitch 4. Then draw the yarn through both the bottom of stitch 4 and the loop already on your hook. This anchors the bottom of the crochet reinforcement.
Turn your work so the rest of the project ends up on your left. This will enable you to work the crochet chain from right to left.
Fold your work between stitch 3 and stitch 4, so one leg of each stitch ends up on top.
Insert your crochet hook under those two top legs and pull up a loop. Then pull the yarn through both loops on the hook. Repeat this down the entire steek, making sure to catch every stitch.
Once you reach the end, anchor the end of the crochet chain in the top of the work, then cut the yarn and draw it through the final loop.
Repeat this on the other side of the steek, starting on the top edge where you just tied off the previous crochet chain reinforcement.
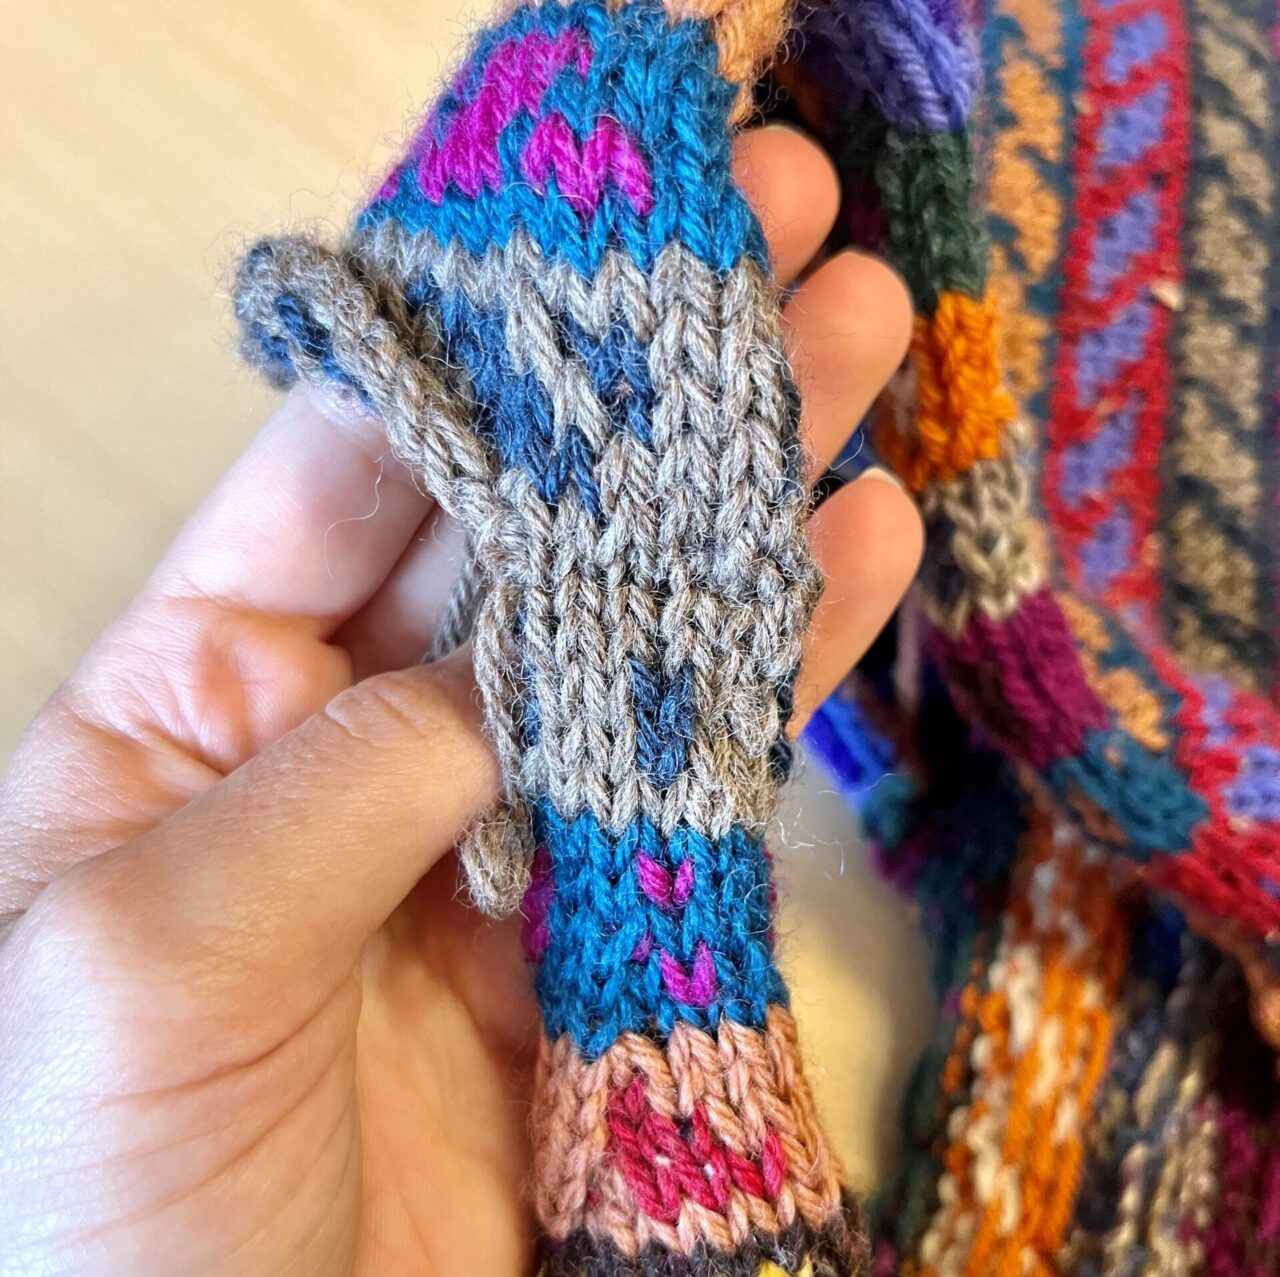
Once all reinforcements on all three steeks are complete, the vest will look like this:
Cut the steek
Then, make the cut down the middle of the two reinforcements on all of the steeks.
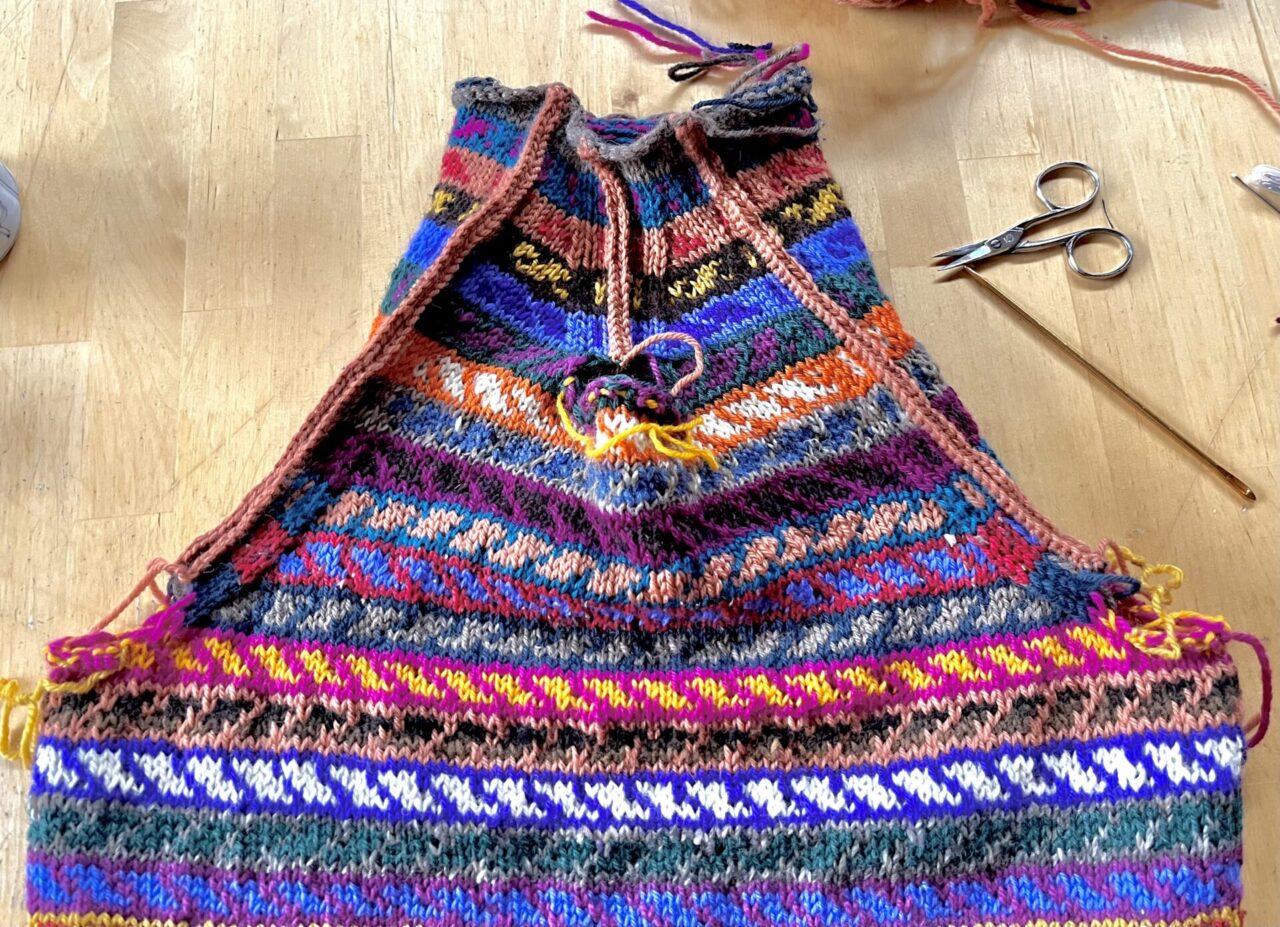
When you have cut all of them, the vest will look like this:
Fold in steek edges
Before we sew the shoulder seam, we need to fold in the edges of the steek at the armhole and neckline to get a clean finish.
The folds should occur between the last “body” stitch and the first steek stitch. This image shows where to fold.
Fasten edges
With both edges folded in, the front shoulder strap will look like this on the back side. Larger sizes will have slightly more space between the two steek edges.
I used the yellow yarn in this image to whipstitch the tops together so they stay put. Attaching just the top is enough for now – we will fully attach the edges later.
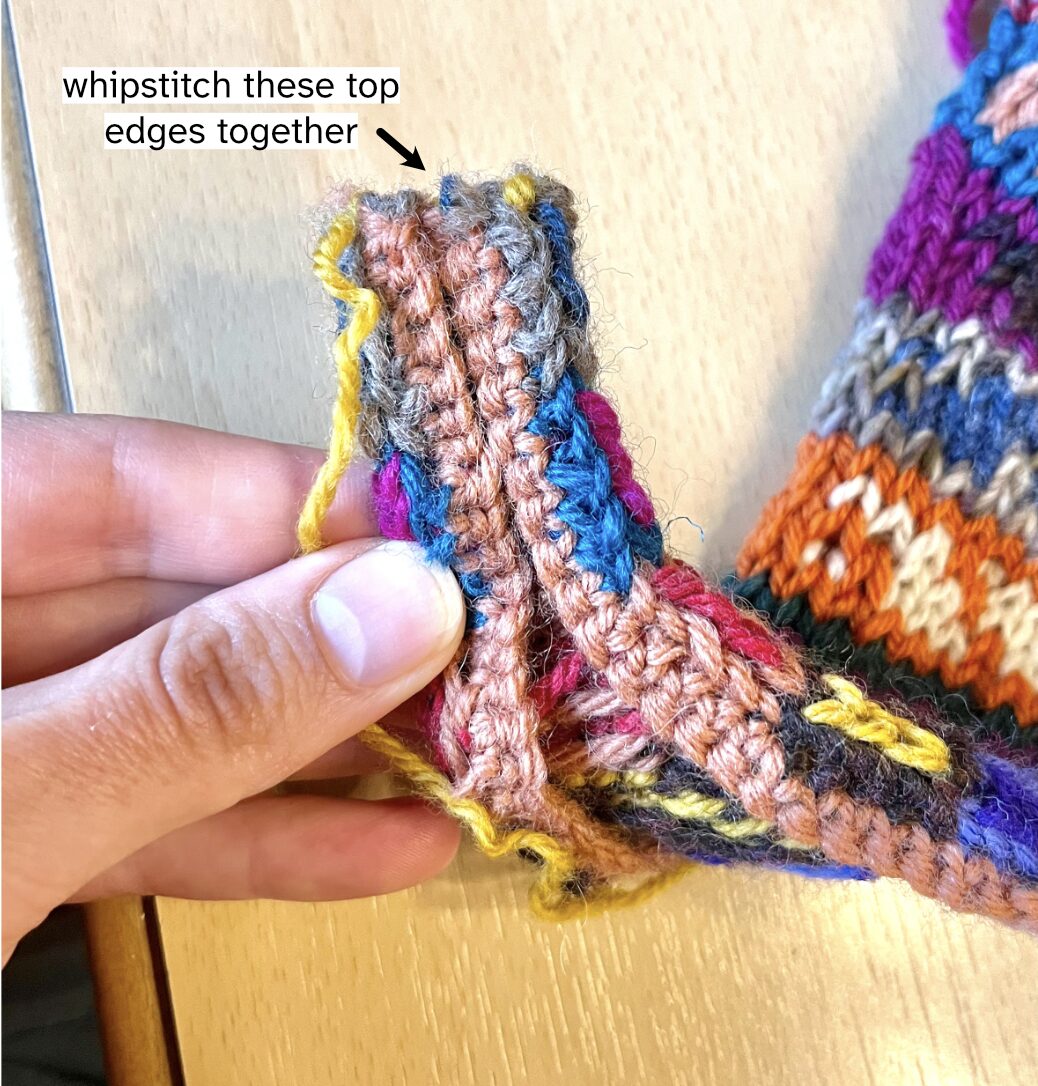
Fold and stitch the top back armhole edge as well.
Join front and back shoulders
Now we can sew the front and back shoulder together using a tapestry needle. I did this with a variation on Kitchener stitch, but because this seam is so short, feel free to improvise. If you don’t feel comfortable with Kitchener stitch, you can also place the two sides wrong sides together and whip stitch them together.
The method I used worked like this.
When both sides are joined, they should look like this.
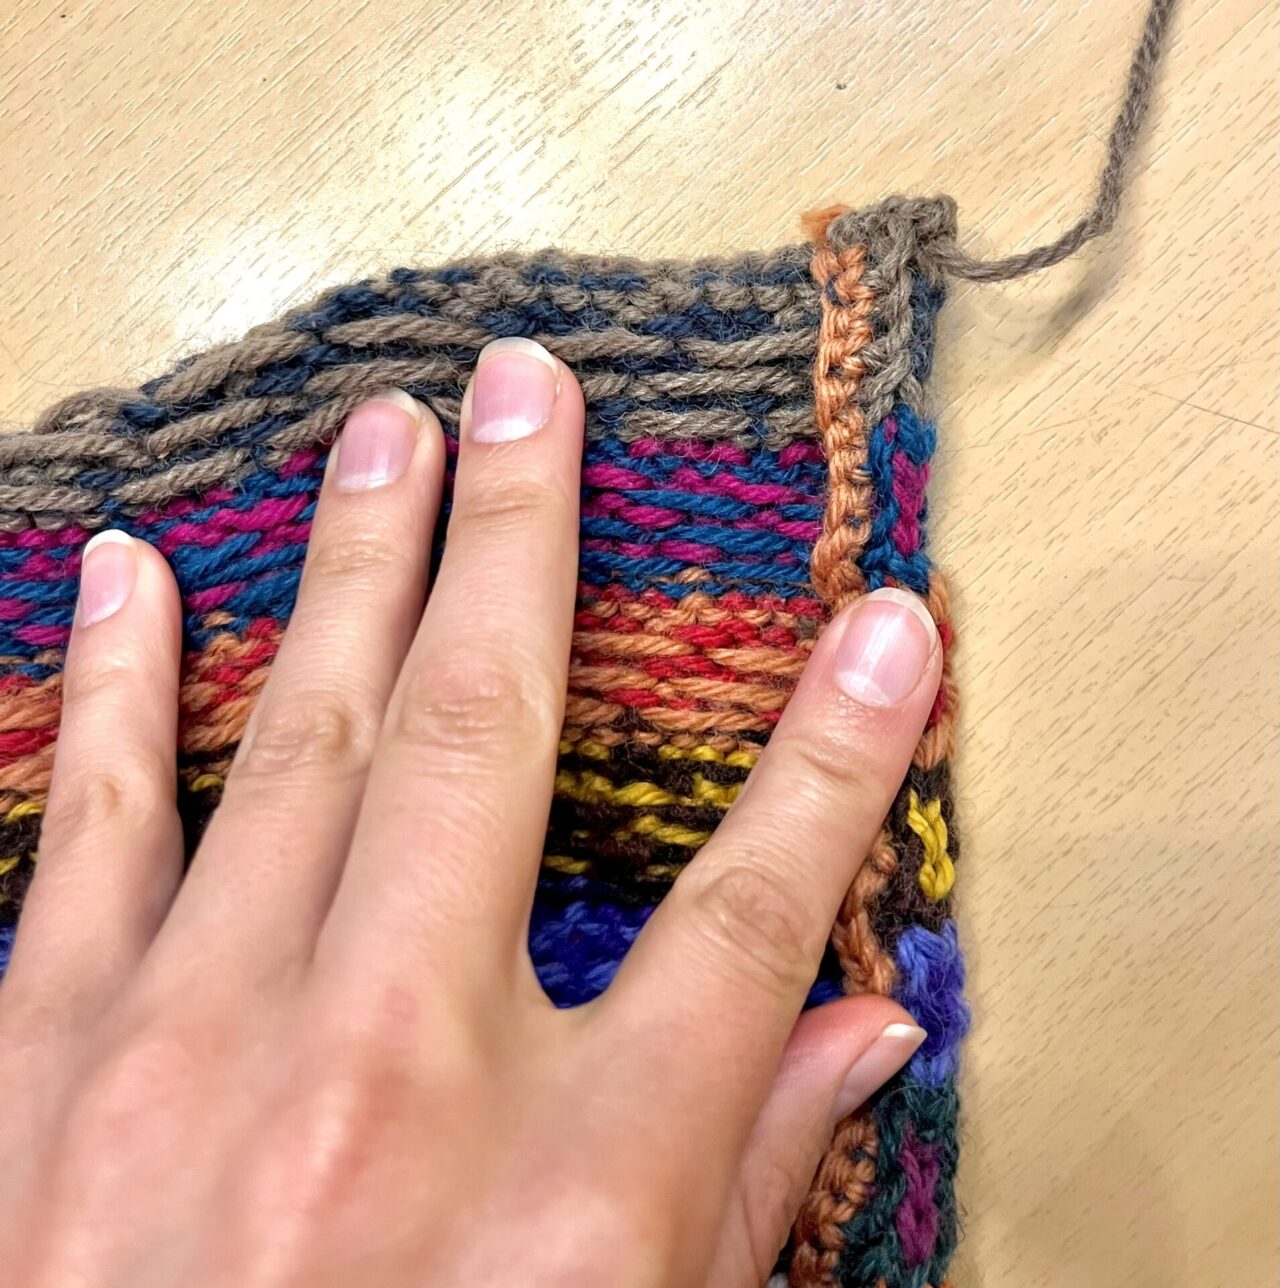
Pick up stitches
Now we need to pick up stitches to knit the ribbing on the armholes and the neckline.
Refer to the pattern PDF for stitch counts and directions.
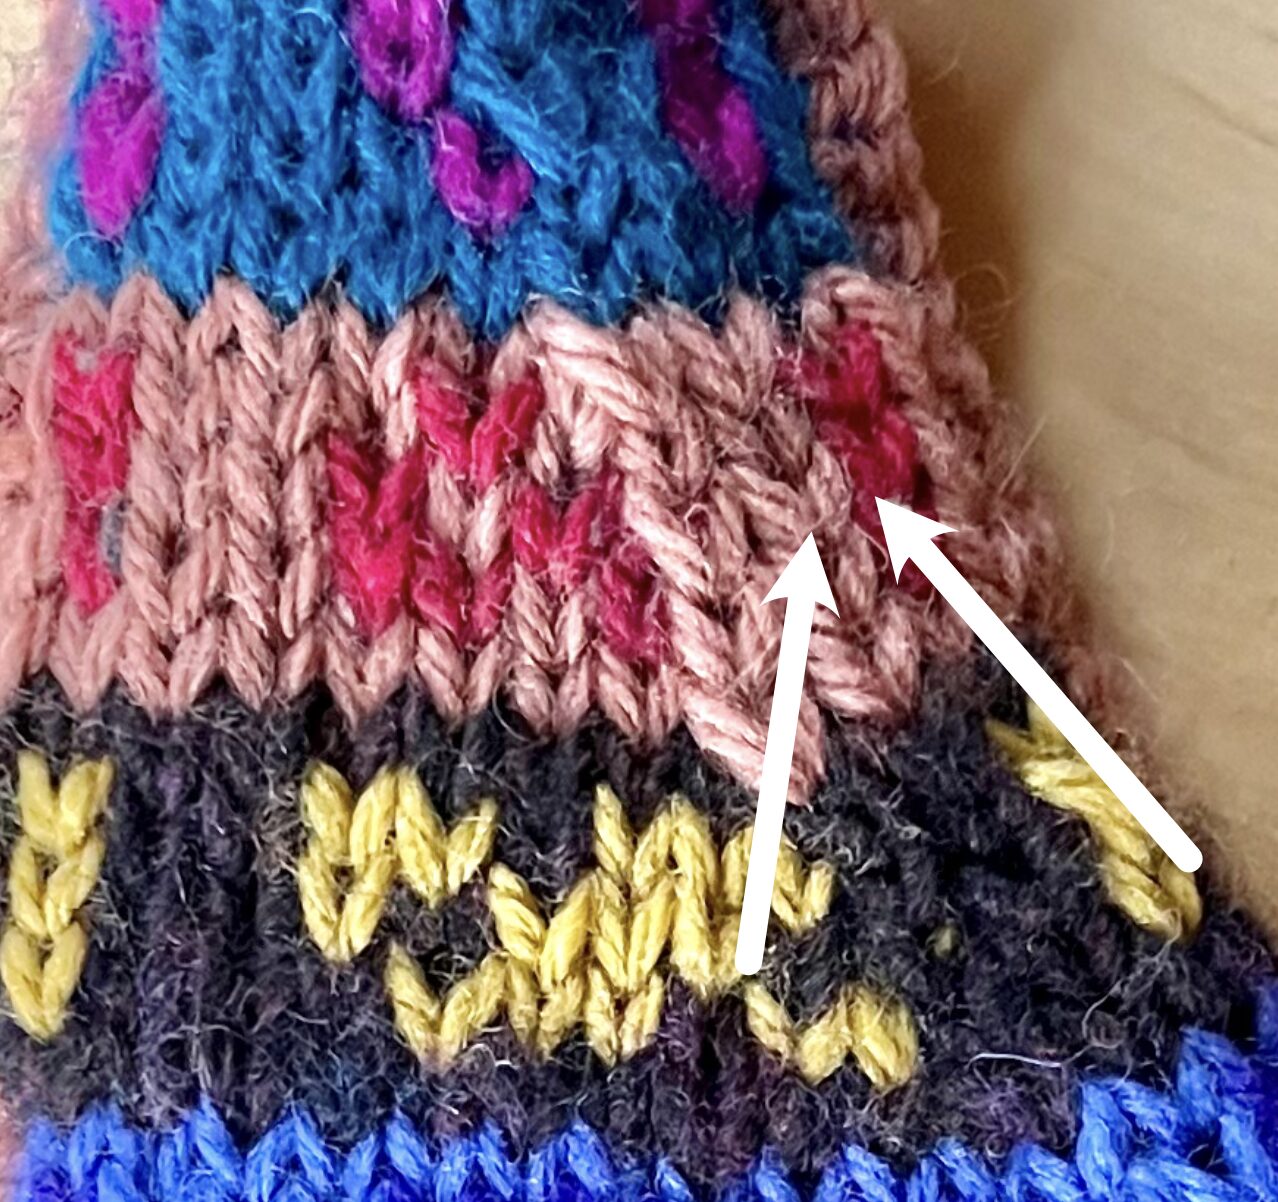
You will be picking up stitches by inserting your needle under one leg of the last “body” stitch and one leg of the first steek stitch.
This image was taken before the steek edge was folded. It points at the stitch legs your needle will pass under. Because the fold occurs at this junction, it should be fairly easy to find these stitches.
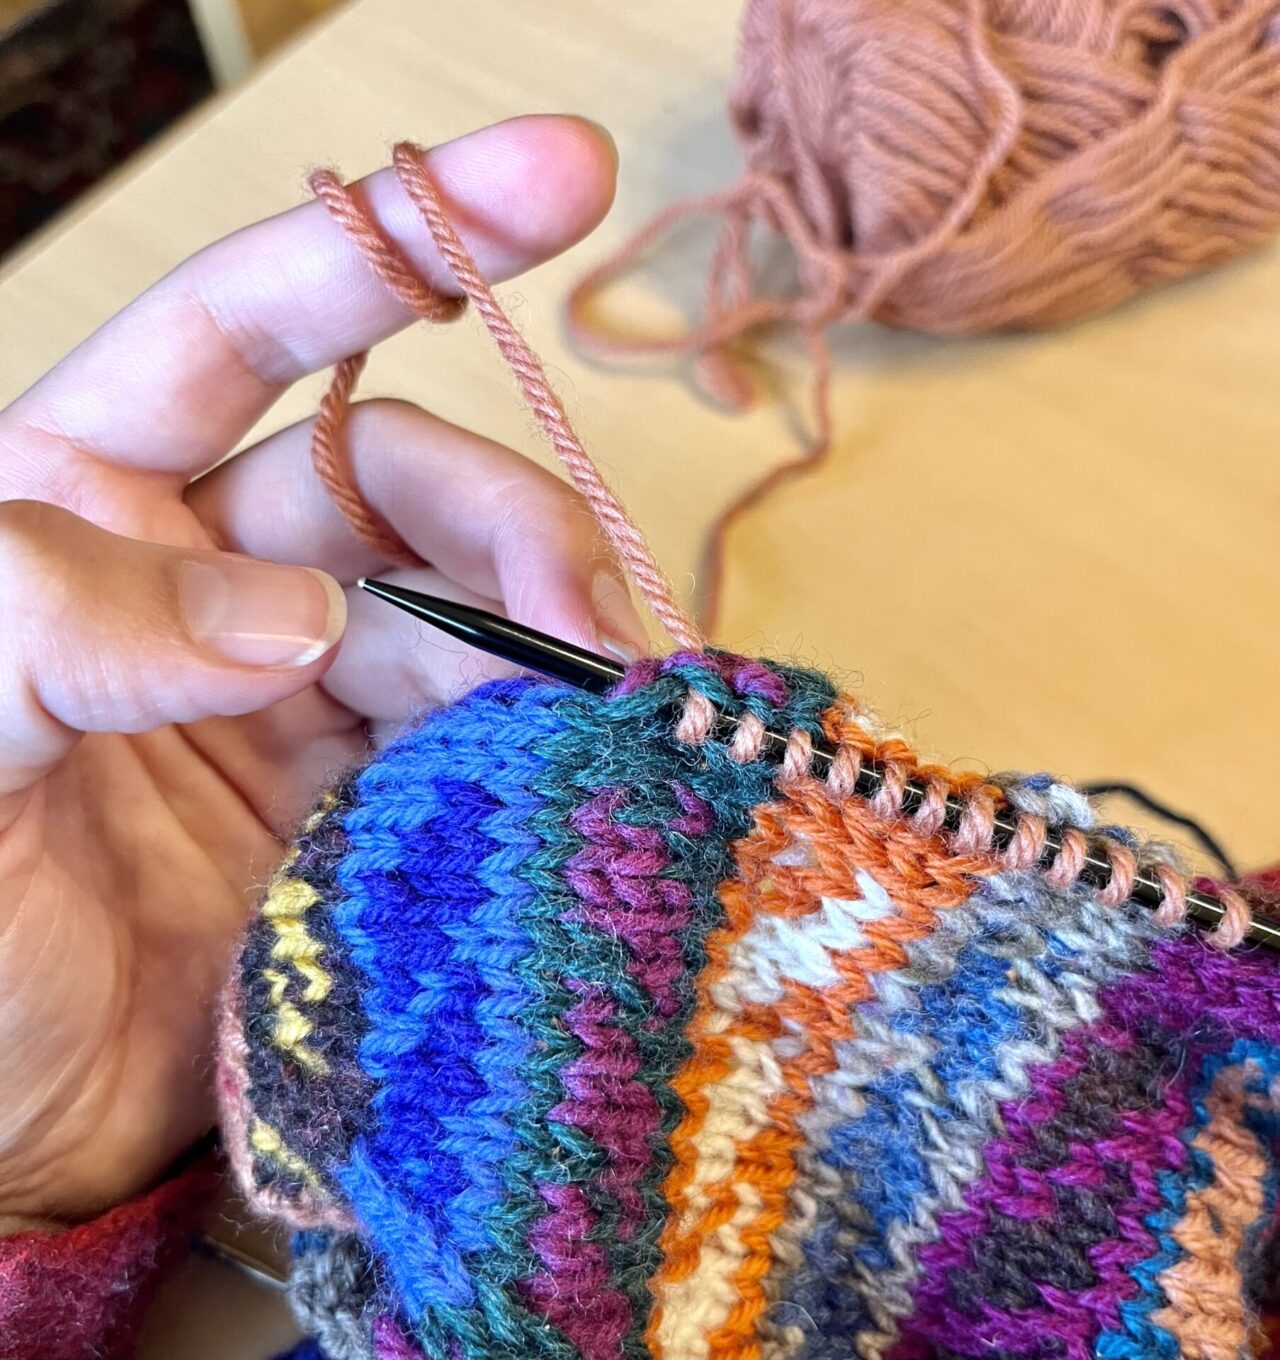
Here is a photo of this in action. You can see that one leg of the steek stitch and one leg of the body stitch are now on the needle.
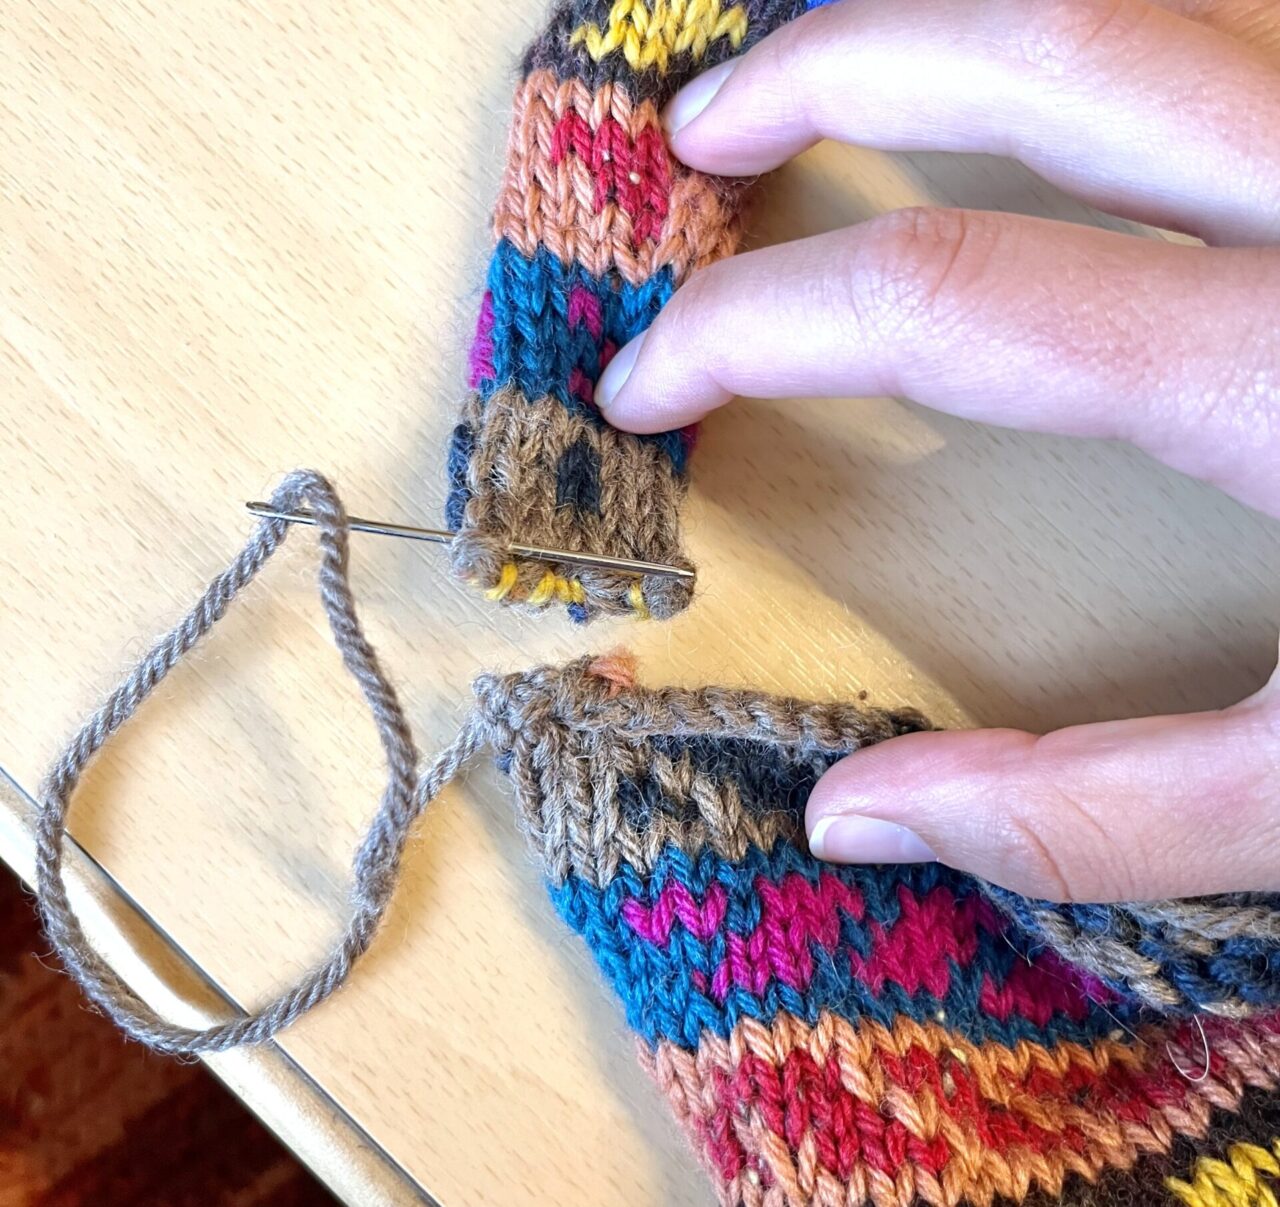
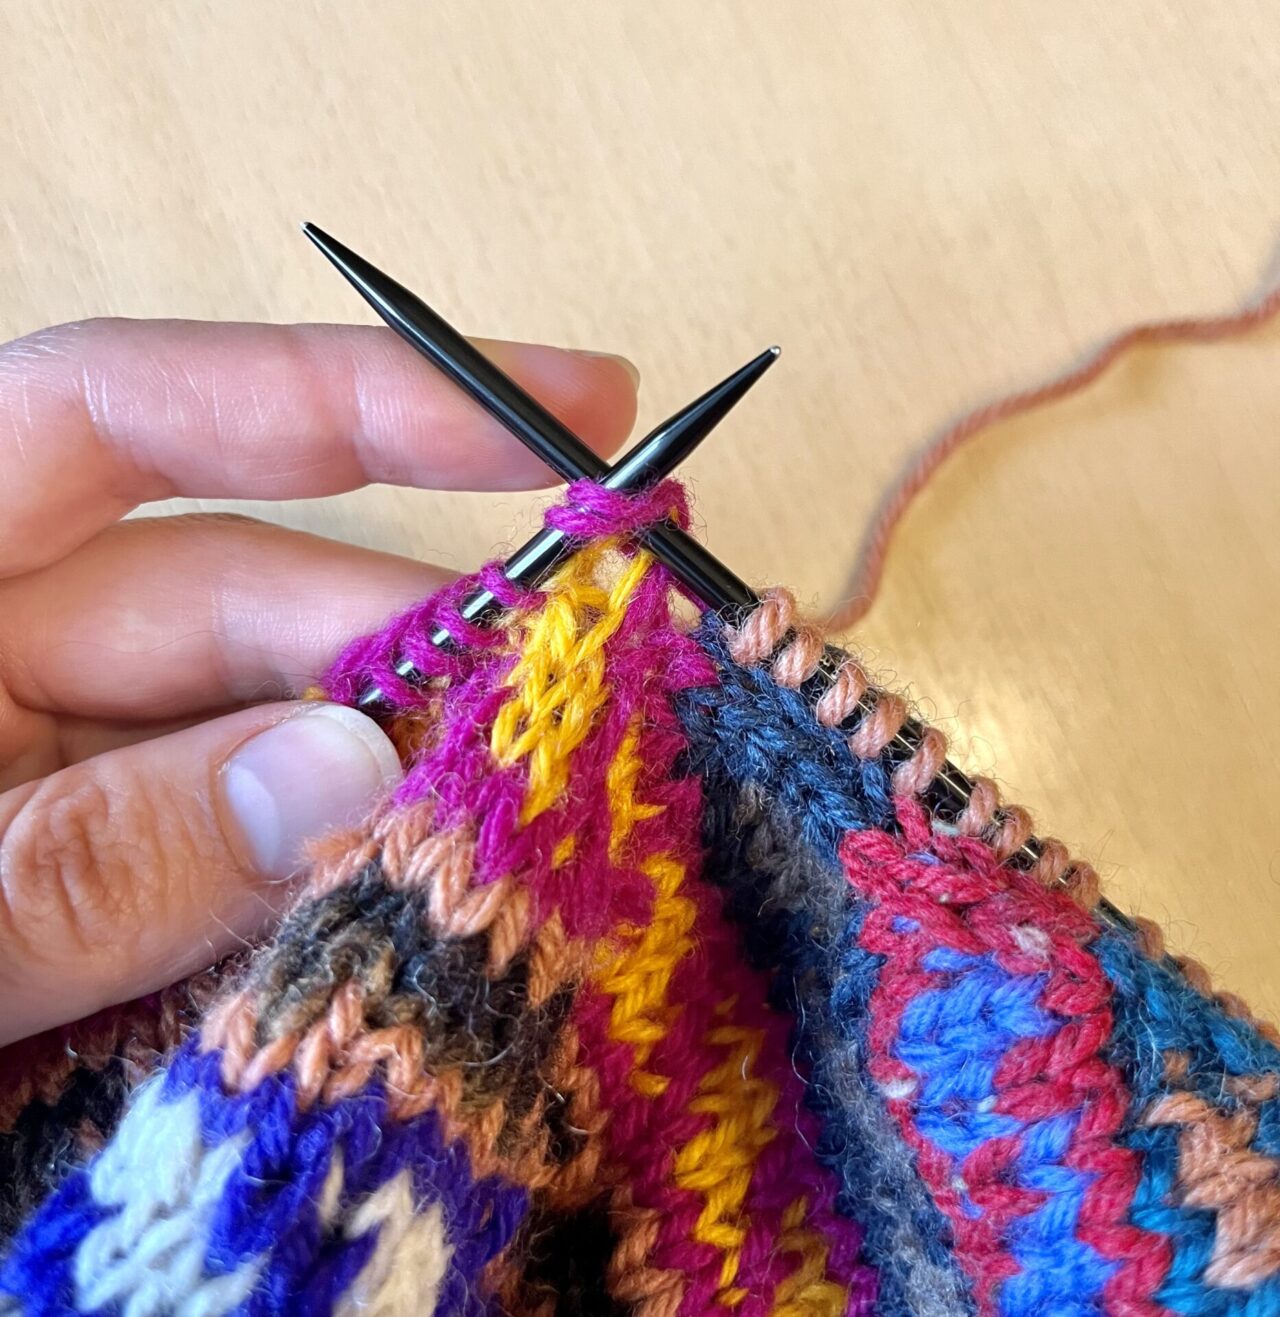
Close any gaps
At the junctions between the live held stitches and the steeks, you may find there is a gap. (For example, between the underarm stitches and the armhole stitches, and between the center front neck stitches and the neckline edge.)
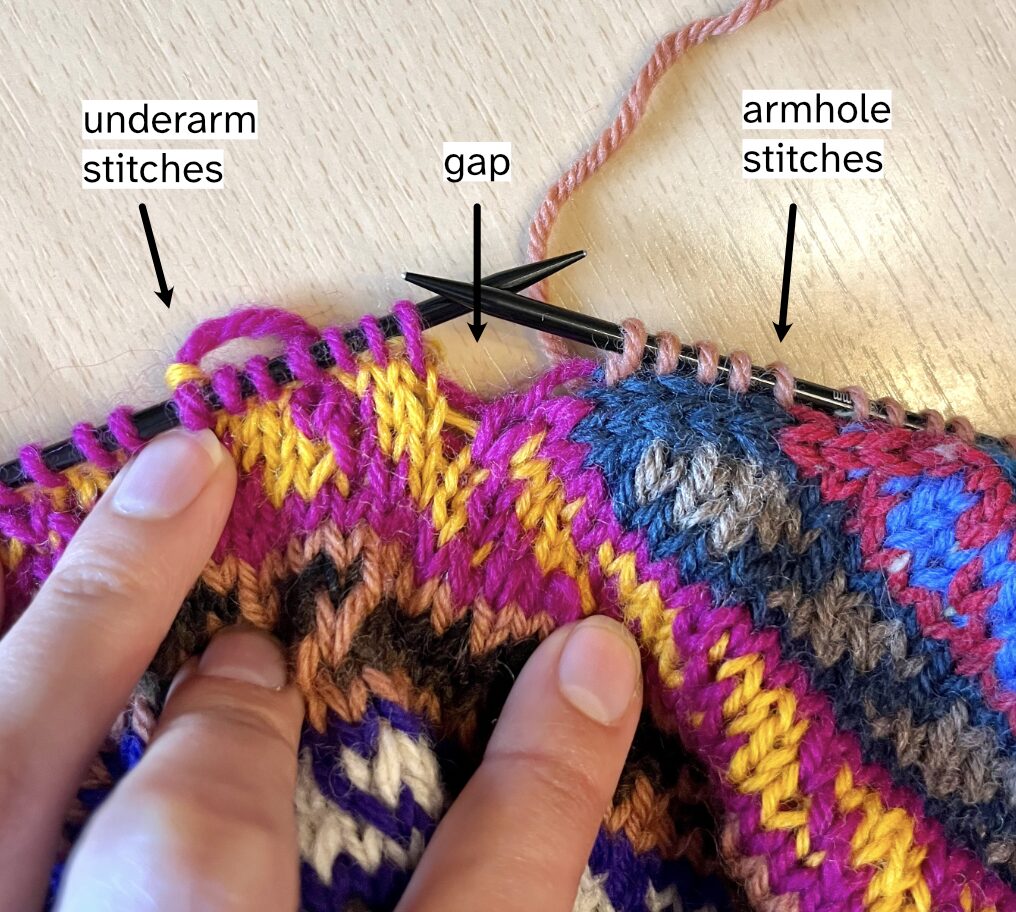
Lift one of the legs of the stitch from the row below on the right side of the gap onto the left needle.
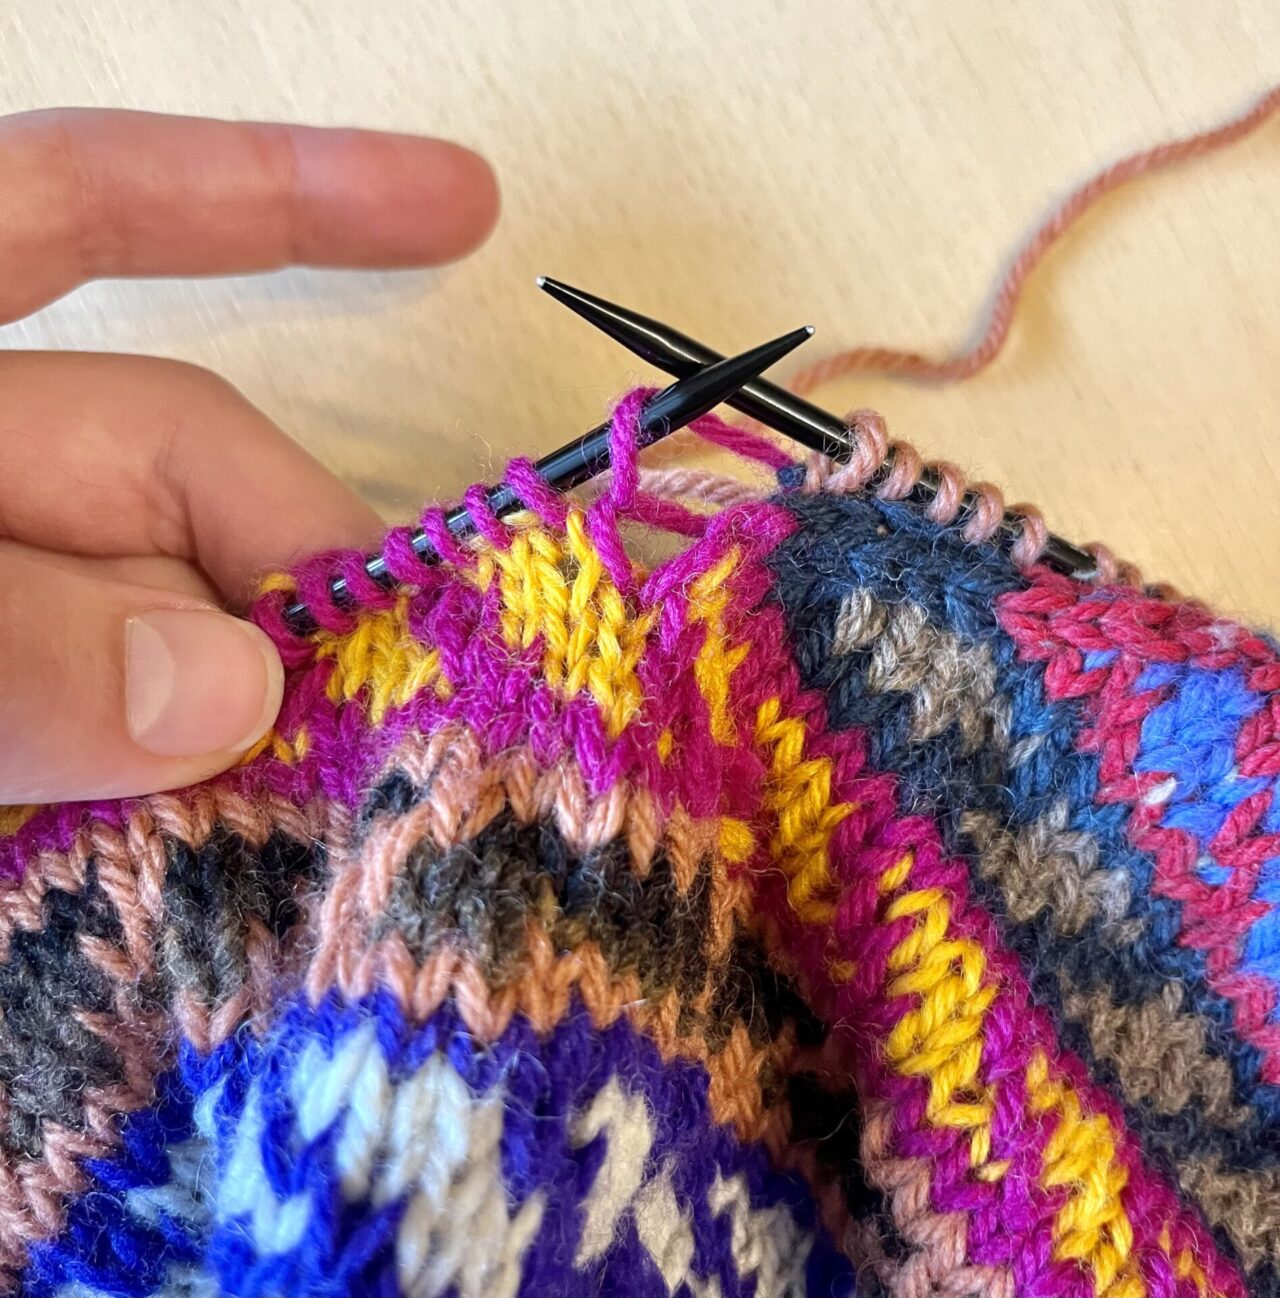
Knit it together with the next stitch.
Then, continue working your pickups as usual.
Fasten the steek edge
When you have finished knitting the ribbing, you will be left with a small flap on the inside. We’re about to stitch this down.
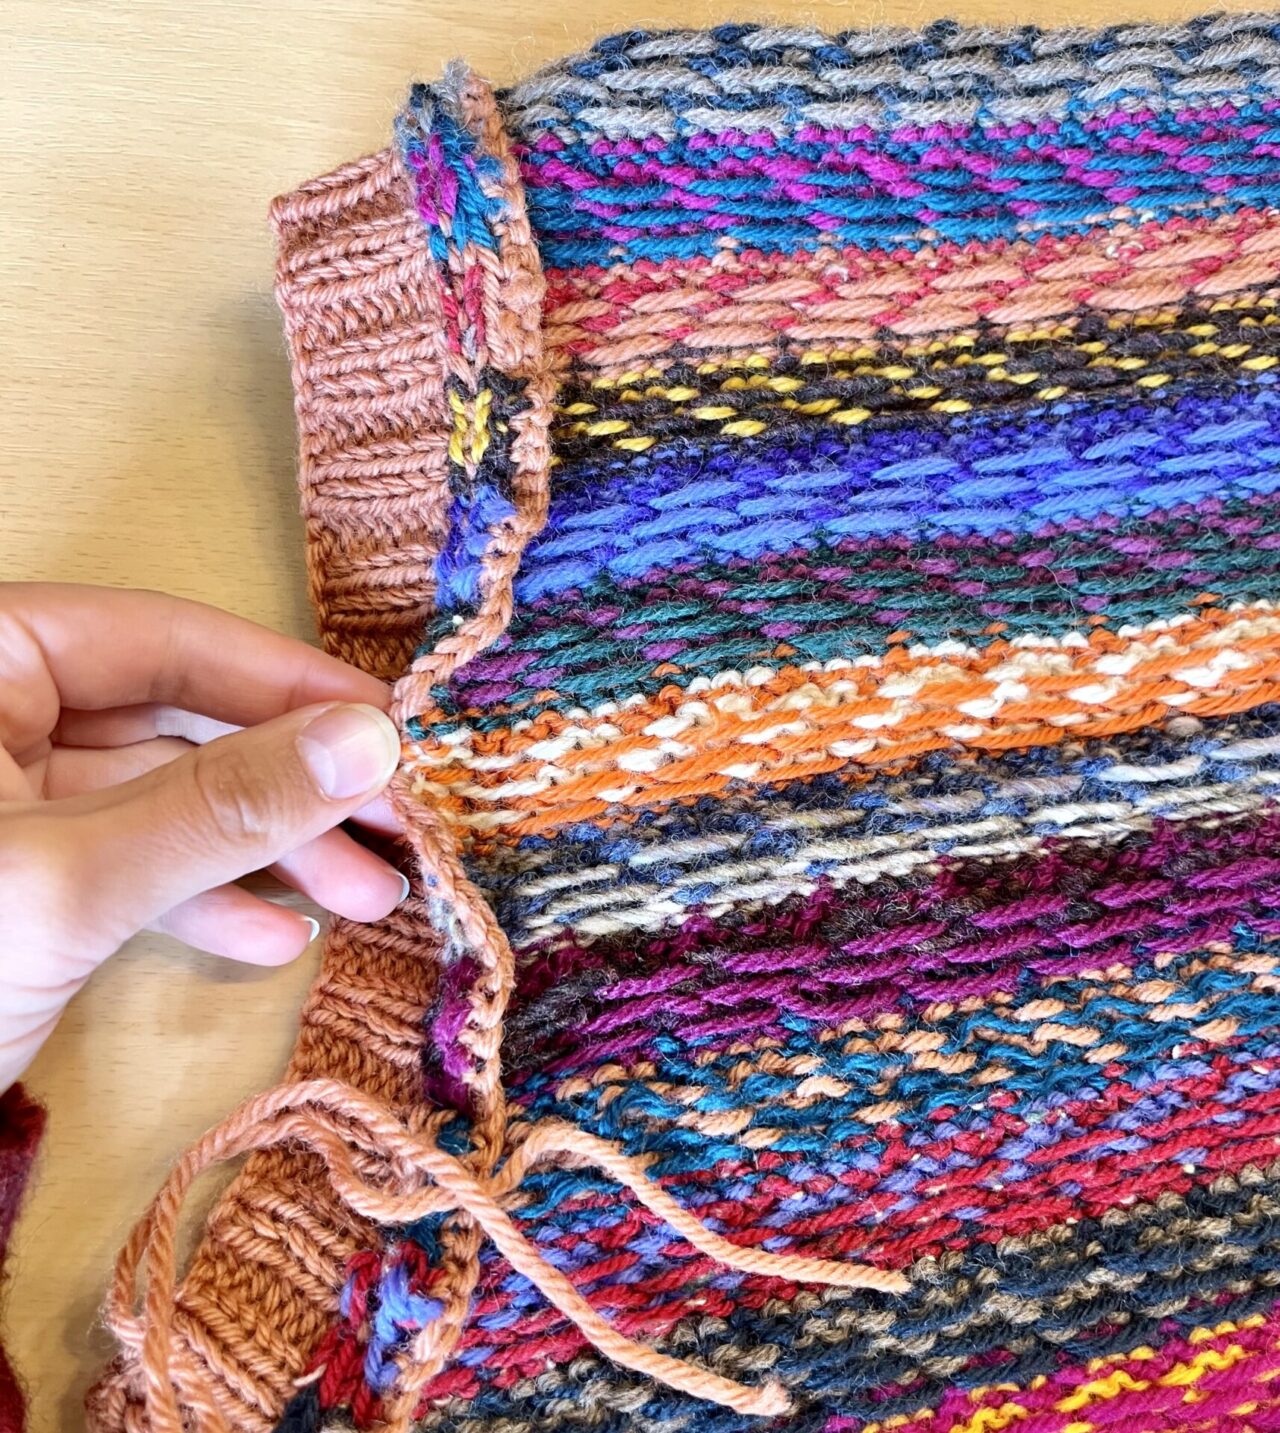
Using a tapestry needle and an extra piece of yarn, or perhaps a tail leftover from another portion, whipstitch the flap to the wrong side of your knitting. Pass the needle under the floats of the colourwork to anchor the flap to the inside. This ensures that you can’t see these stitches from the outside of the vest.
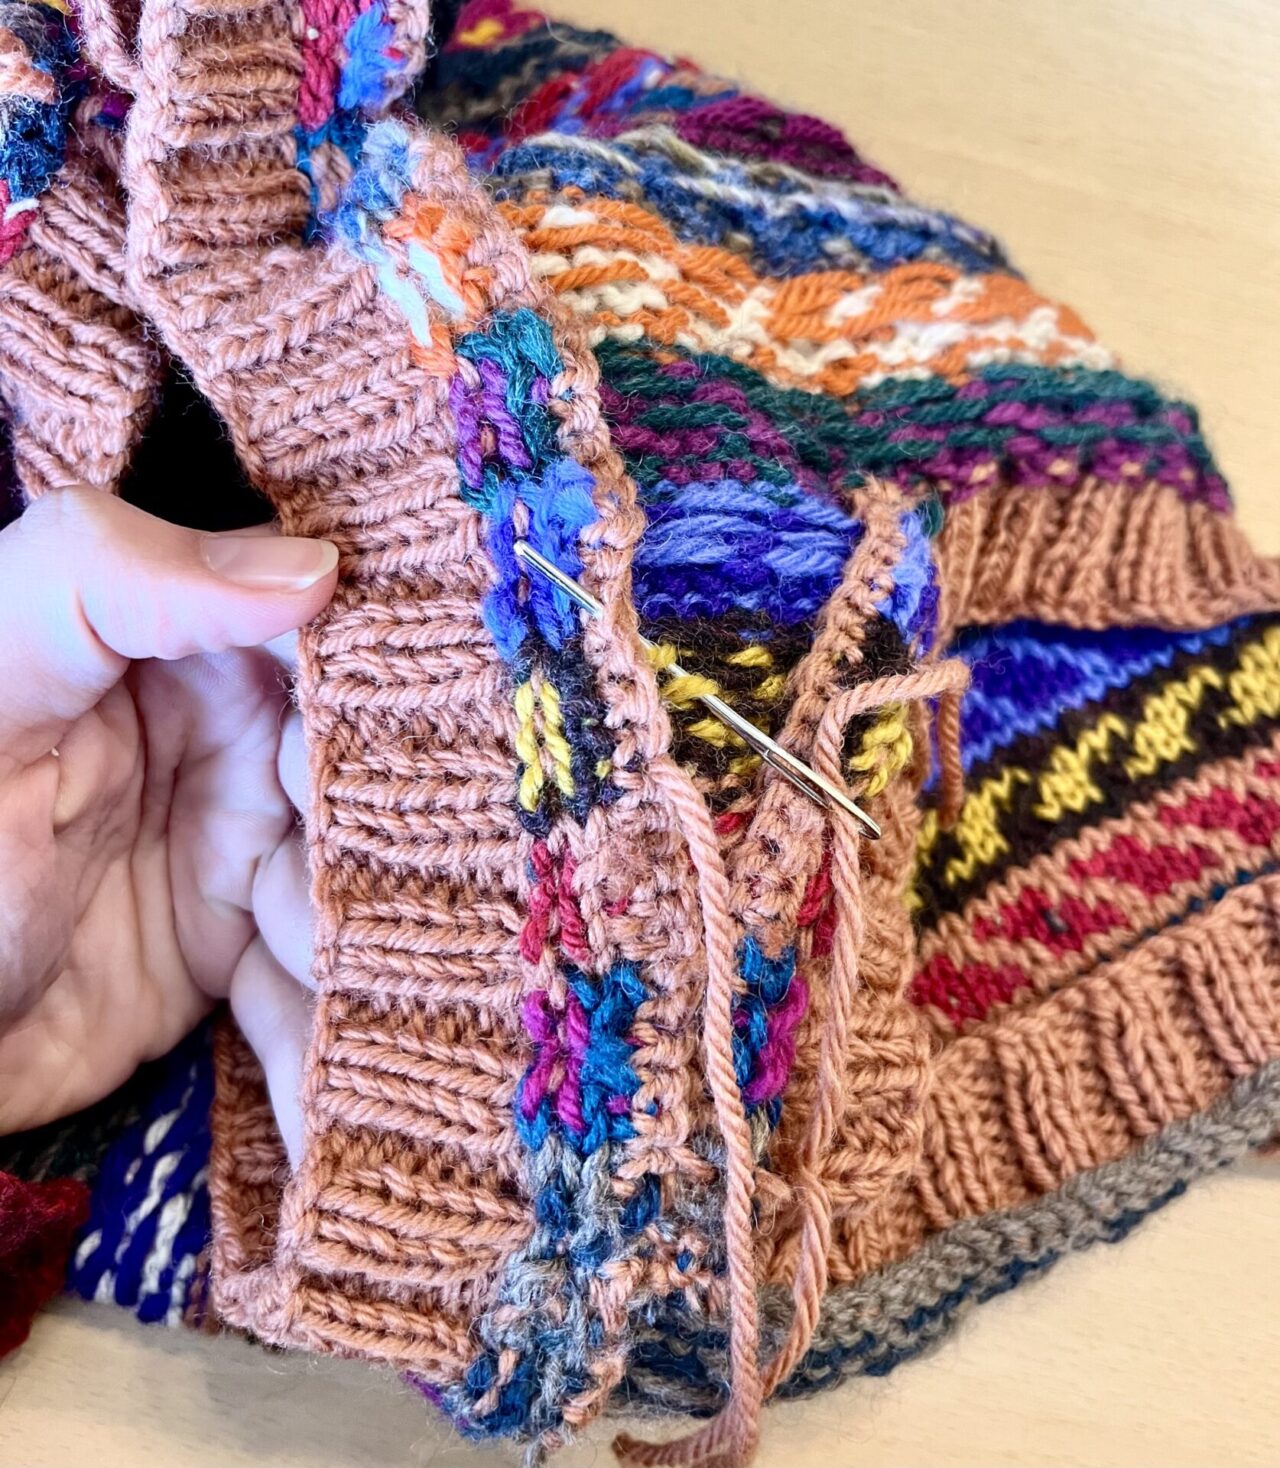
If there are any escapees, use your crochet hook to pull them through to the underside of the steek flap. They’ll be secure enough once everything is stitched down.

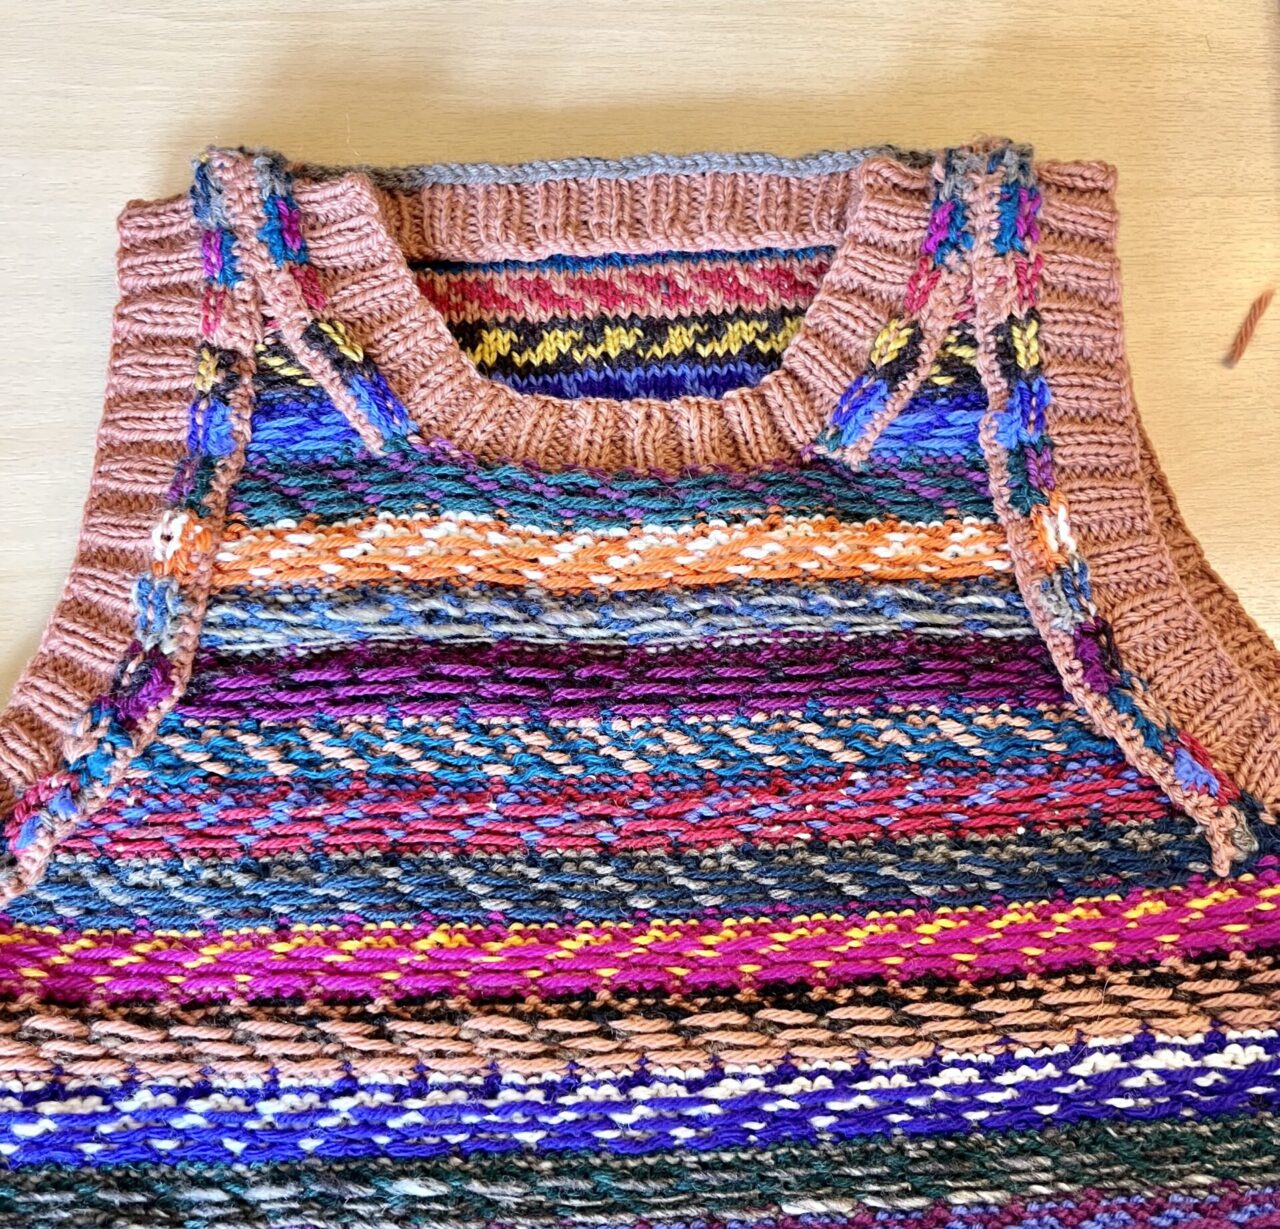
Once your edges are fully stitched down, they should look like this.
Congratulations!
You’ve completed Steek Exposure Therapy!
Block it by giving a good soak, pressing out the water with a towel, and laying it flat to dry. This will settle any remaining lumps and bumps and teach the ribbing to sit flat.
That wasn’t so bad, was it?